Getting Started with Discussion Board
Once you’ve installed and activated Discussion Board, the plugin will automatically add three new pages to your site:
- Topics: this page contains the
[discussion_topics]shortcode which will display existing topics in a table or list - Log In: this page will display a log-in and registration form using the
[discussion_board_login_form]shortcode - New Topic: this page contains the
[discussion_board_form]which will display a form for users to post new topics
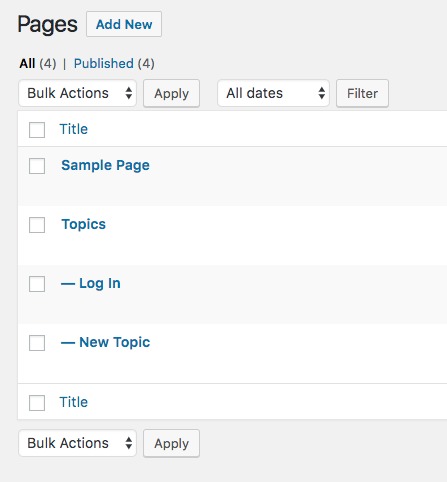
You can change the titles of these pages and add further content if you wish but the pages should always contain the shortcodes to ensure the plugin functions correctly.
If you don’t wish to use the plugin’s log-in form, you can delete the Log In page.
For further details of the shortcodes added to these pages, including parameters and alternatives, please take a look at this page.
These pages are all you need for Discussion Board to work on your site.
Settings
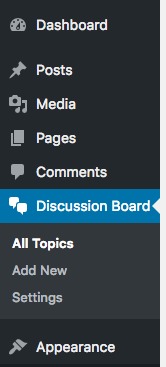
The plugin will also create a new menu item – Discussion Board. Here you can see a list of all topics that have been posted. You can also configure the plugin settings by clicking on Discussion Board > Settings:
For general settings, such as updating front-end content, or changing moderation, posting or notification settings, read the article on the General tab.
For design and layout settings, read the article on the Design tab.
For user and permission settings, take a look at the article on the User tab.
General Tab
The General tab has the main settings for the plugin. This includes settings for the pages that are created when the plugin is activated, front-end messages, and options for posting new topics and for registration and log-in.
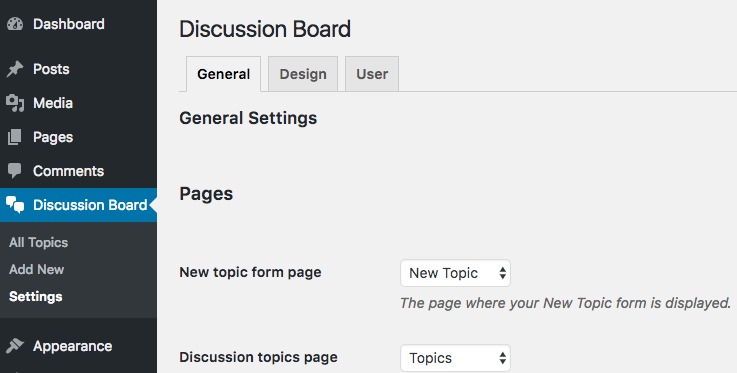
In your dashboard, go to Discussion Board > Settings.
Pages
New topic form page
This is the page on your site where users can add new topics. It should contain the [discussion_board_form] which displays the New Topic form.
Discussion topics page
The page where your Discussion Topics are displayed. The [discussion_topics] shortcode should be on this page.
Log-in form page
The page that displays your log-in form. The [discussion_board_login_form] shortcode should be on this page.
All these pages will have been automatically created when you activated the plugin (version 2.0.0 and up). For more information on which pages are created when the plugin is activated, please see this article.
Redirect on log-in
Set this option to redirect the user to this page when they log in.
Messages
Archive title
The page title on your archive page.
New topic message
Message to display to the user above the new topic form.
Restricted message
Display this content to a user who doesn’t have access, e.g. they are not logged in or do not have sufficient privileges.
Log In and Registration
Hide WP Login
This will prevent access to the standard wp-login.php page. All users will need to log in via the front-end log-in / registration form. The only exception to this is for users who require password retrieval.
For this option to work correctly, you must ensure the ‘Log-in form page’ (above) is set correctly.
Hide log-in form with restricted content?
Enable this if you don’t want to offer the log-in / registration form to users who are trying to access content when they’re not logged in. Use this option if you have your own log-in / registration process that you want to follow.
Prevent wp-admin access
Redirect users away from the dashboard and hide the toolbar on the front-end.
Add check to registration form to prevent spam
Add an additional field to the registration form requiring the user to confirm their humanity.
Posting
Publish new topic without moderation
Select this option to publish all new topics immediately; deselect it to set new topics to draft.
Prevent user re-posting
Set a minimum time before users can post a new topic.
Notifications
Email address for notifications
By default, notifications will go to the site admin. Enter a different address here if you prefer.
Enable poster notification opt-out
Select this option to allow users who post a new topic to choose not to receive notifications of comments on that topic.
Design Tab
The Design tab allows you to update how the plugin is displayed within your theme.
In your dashboard, go to Discussion Board > Settings and click on the Design tab.
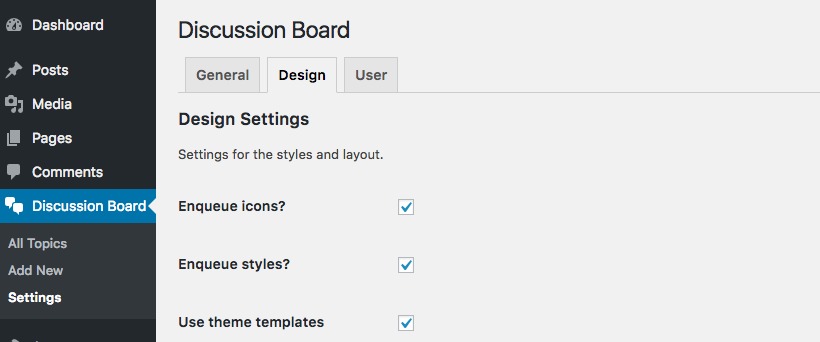
Enqueue icons
Select this option to include icons in the topic meta data – i.e. user icon, comments icon and calendar icon.
Enqueue styles
Deselect this if you don’t want to load the plugin’s stylesheet. You will need to create your own styles for the plugin to replace the default styles.
Use theme templates
Deselect this to use the templates included with the plugin. By default, the plugin will use your theme’s templates, which is the best way to keep a coherent design. If you prefer, you can use your own templates: please see guidance on using your own templates.
Archive layout
Choose from ‘Standard’, ‘Table’ or ‘Classic Forum’:
- Standard
Will use the archive templates to display posts - Table
Will display the list of topics in a table - Classic Forum
Will display topics in a table and present single pages in a typical forum layout
Single topic layout
This will mainly determine how meta field information for your topic, such as the number of replies, is laid out. Choose from ‘Standard’, ‘Table’ or ‘Classic Forum’:
- Standard
Will use a simple ‘information bar’ to display topic meta fields
- Table
Will display the list of topics in a table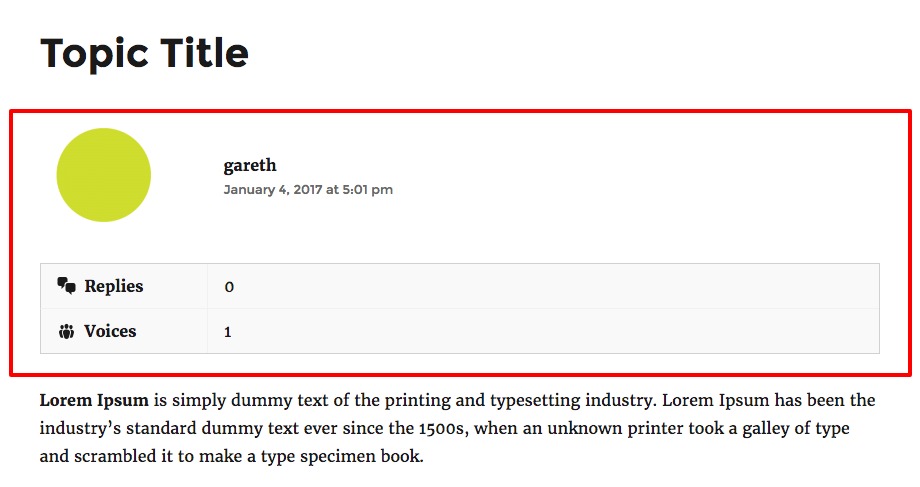
- Classic Forum
Will display topics in a table and present single pages in a typical forum layout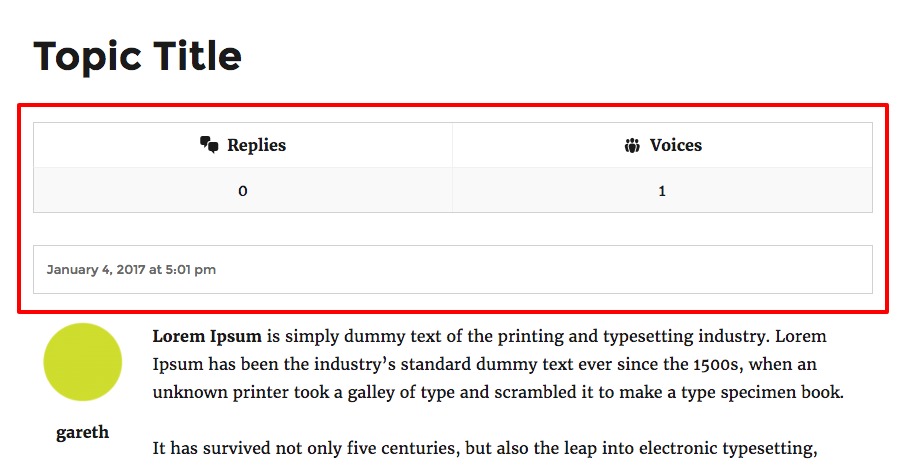
Meta data fields
Choose which fields to display. The free version of the plugin allows for Replies (number of replies to the original topic) and Voices (number of users involved in the discussion).
The Pro version also allows for Freshness (how recently the topic was added or commented on) and Followers (the number of users following the topic).
Topic meta data position
Where to display the topic meta – author, number of comments, date posted: under the title or under the main content.
Number of topics per page
How many topics to display on an archive page.
User Tab
The User tab defines user roles and permissions for the plugin.
In your dashboard, go to Discussion Board > Settings and click on the User tab.
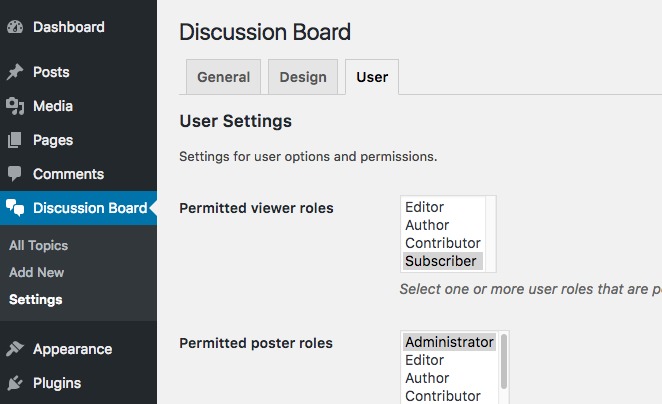
Permitted viewer roles
Select which roles are able to view discussion topics. You can select multiple roles here (Administrators are always able to view topics)
If you would like everyone to be able to view topics, even users who are not logged in, leave this field empty, i.e. with no roles selected.
Permitted user roles
Select which roles are able to post discussion topics. You can select multiple roles here (it’s recommended you always included Administrator).
If you would like everyone to be able to post topics, even users who are not logged in, leave this field empty, i.e. with no roles selected. Note that this is more likely to result in spam posts.
Register new user as
Specify what role new users will be registered as. By default, this will be Subscriber.
Require account activation
Enable this option to send a confirmation email to users after registration. Users will need to click the activation link contained in the email in order to complete their registration.
Note that if you have the Developer or Unlimited Pro license, you can also choose the ‘Admin must approve’ option here. This will enable admin approvals for all registrations, allowing you greater control over who can post on the forum.
Email blacklist
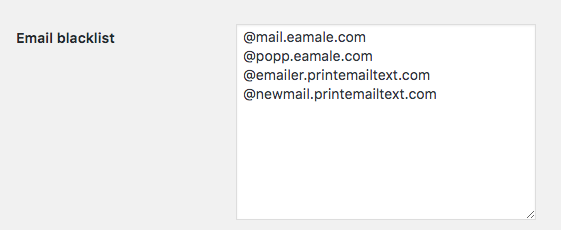
You can block specific email addresses and domains from registering on your site. Anyone trying to register using a blacklisted email will find that their registration attempt fails silently.
To block emails, go to Discussion Board > Settings > User tab and enter an email address in the ‘Email blacklist’ field, e.g. [email protected] will cause this email address to fail registration.
If you want to block an entire domain, enter the domain preceded by the ‘@’ symbol: e.g. @spammer.com will cause all email addresses from the spammer.com domain to fail registration.
Enter one address per line.
